ShopifyJavaScriptCSS
今回は『Shopifyの商品詳細画面、オプション選択のJavaScriptの処理を考察(初学者向け)』で取り上げた話を一歩進めまして、バリエーションを文字ではなく画像で表現する方法を考察してみたいと思います。といっても、前回の延長戦ですからそんなに難しいことではありません。テーマはDawn(6.0.2)です。
2022年8月20日
再現したいもの
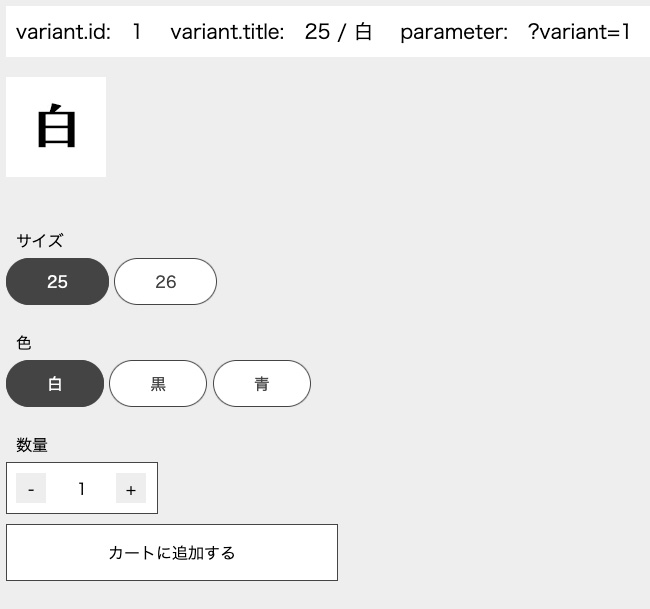
『Shopifyの商品詳細画面、オプション選択のJavaScriptの処理を考察(初学者向け)』では以下のような表現を考察しました。
・DEMO画面はこちら
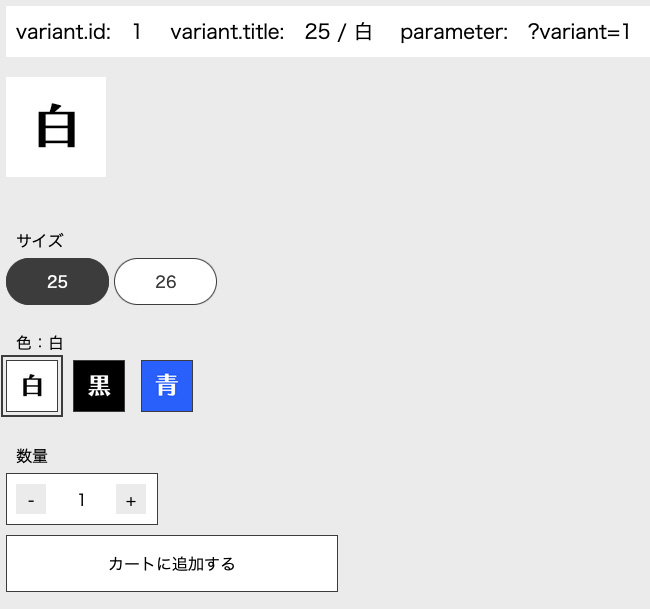
今回は色のバリエーションを文字ではなく画像で表示をする方法を考察します。
・DEMO画面はこちら
ひと通り考察した後に、実際にshopifyのテンプレート(sections/main-product.liquid)に埋め込んでみます。

htmlの記述
まずhtmlですが簡略化して書くと以下のようになっていれば画像の表示とテキストの書き換えができます。
<fieldset>
	<legend>色<span id="color-txt"></span></legend>
	<input type="radio" name="色" value="白" id="color-1" checked>
	<label class="color-label" for="color-1"><img src="" class="color-img"></label>
	<input type="radio" name="色" value="黒" id="color-2">
	<label class="color-label" for="color-2"><img src="" class="color-img"></label>
	<input type="radio" name="色" value="青" id="color-3">
	<label class="color-label" for="color-3"><img src="" class="color-img"></label>
</fieldset>
色は画像だけでなく文字でも表記したいので、それ用の要素(<span id=”color-txt”></span>)を作っておきます。画像はlabel要素のなかに入れておきます。
JavaScriptの記述
考え方は前回『Shopifyの商品詳細画面、オプション選択のJavaScriptの処理を考察(初学者向け)』と同じで、JSONデータのなかの画像パスを引っ張ってきてimg要素のsrc属性に入れます。
各バリーエーションの中のfeatured_imageのsrcの値が目的の画像パスです。今回は白、黒、青で画像はそれぞれ1種類という前提で話しを進めます(25/白と26/白の画像は同じ)。
<script type="application/json">
[
{
"id":1,
"option1":"25",
"option2":"白",
"option3":null,
"title":"25 \/ 白",
"featured_image":{"src":"\/images\/white.jpg"}
},
{
"id":2,
"option1":"25",
"option2":"黒",
"option3":null,
"title":"25 \/ 黒",
"featured_image":{"src":"\/images\/black.jpg"}

},
{
"id":3,
"option1":"25",
"option2":"青",
"option3":null,
"title":"25 \/ 青",
"featured_image":{"src":"\/images\/blue.jpg"}
},
{
"id":4,
"option1":"26",
"option2":"白",
"option3":null,
"title":"26 \/ 白",
"featured_image":{"src":"\/images\/white.jpg"}
}
,
{
"id":5,
"option1":"26",
"option2":"黒",
"option3":null,
"title":"26 \/ 黒",
"featured_image":{"src":"\/images\/black.jpg"}
},
{
"id":6,
"option1":"26",
"option2":"青",
"option3":null,
"title":"26 \/ 青",
"featured_image":{"src":"\/images\/blue.jpg"}
}
]
</script>
では、JavaScriptです。前半部分が画像を入れる処理で、後半部分はテキストを書き換える処理です。
画像を入れる処理では、img要素から見て親要素(label)の直前の兄弟要素(input)のvalue値を取得して、JSONデータの中からそのvalue値を持つバリエーションの画像パスを取得しています。前述した通り25/白と26/白の画像は同じという前提なので、JSONデータにfilterをかけてヒットしたものの一つ(今回は1番目のものproduct[0])のsrc値を使用しています。
テキストの処理はinputがクリックされたら、そのvalue値を取得して#color-txtのテキストを書き換えるという処理です。
・DEMO画面はこちら
{
  const data = document.querySelector('[type="application/json"]').textContent;
  const from_json = JSON.parse(data);

  const colorimgs = document.querySelectorAll('.color-img');
  colorimgs.forEach(function(element, index){
    // input要素のvalue値を取得 img要素から見て親要素の直前の兄弟要素のinput
    color = element.parentNode.previousElementSibling.value;
    // いずれかのオプション値が上記colorであるプロダクト
    const product = from_json.filter( function(variant) {
        return variant.option1 == color || variant.option2 == color || variant.option3 == color;
      });
    // 出てきたプロダクトのsrc値はどれも同じなので最初のプロダクトのsrc値を使う
    element.src = product[0].featured_image.src;
  });

  const colortxt = document.querySelector('#color-txt');
  const colorinputs = document.querySelectorAll('input[name="色"]');
  const len = colorinputs.length;
  colorinputs.forEach(function(element, index){
    element.addEventListener('input', function(){
      // テキストを書き換える(input要素がクリックされたとき)
      colortxt.textContent = ':' + element.value;
    });
  });
  for (let i = 0; i < len; i++){
    if (colorinputs.item(i).checked){
      // テキストを書き換える(画面がロードされたとき)
      colortxt.textContent = ':' + colorinputs.item(i).value;
    }
  }
}
main-product.liquidの記述
では実際にshopifyのテンプレートの埋め込んでみます。テーマはDawn(6.0.2)です。main-product.liquidの368行目から386行目の記述を少し修正します。
■元の記述
{%- for option in product.options_with_values -%}
		<fieldset class="js product-form__input">
			<legend class="form__label">{{ option.name }}</legend>
			{%- for value in option.values -%}
				<input type="radio" id="{{ section.id }}-{{ option.position }}-{{ forloop.index0 }}"
							name="{{ option.name }}"
							value="{{ value | escape }}"
							form="{{ product_form_id }}"
							{% if option.selected_value == value %}checked{% endif %}
				>
				<label for="{{ section.id }}-{{ option.position }}-{{ forloop.index0 }}">
					{{ value }}
				</label>
			{%- endfor -%}
		</fieldset>
{%- endfor -%}
<script type="application/json">
	{{ product.variants | json }}
</script>
option.nameが色だった場合は画像を入れるための記述に変更(2行目)して、色でない場合は元の記述のママという処理です。あと、ページ内にJSONデータが複数あるのでidを振っています(34行目)。
■修正後の記述
{%- for option in product.options_with_values -%}
	{%- if option.name == '色' -%}
		<fieldset class="js product-form__input">
			<legend class="form__label">{{ option.name }}<span id="color-txt"></span></legend>
			{%- for value in option.values -%}
				<input type="radio" id="{{ section.id }}-{{ option.position }}-{{ forloop.index0 }}"
							name="{{ option.name }}"
							value="{{ value | escape }}"
							form="{{ product_form_id }}"
							{% if option.selected_value == value %}checked{% endif %}
				>
				<label class="color-label" for="{{ section.id }}-{{ option.position }}-{{ forloop.index0 }}">
					<img src="" class="color-img" alt="{{ product.title | escape }}" height="120" width="120" loading="lazy">
				</label>
			{%- endfor -%}
		</fieldset>
	{%- else -%}
		<fieldset class="js product-form__input">
			<legend class="form__label">{{ option.name }}</legend>
			{%- for value in option.values -%}
				<input type="radio" id="{{ section.id }}-{{ option.position }}-{{ forloop.index0 }}"
							name="{{ option.name }}"
							value="{{ value | escape }}"
							form="{{ product_form_id }}"
							{% if option.selected_value == value %}checked{% endif %}
				>
				<label for="{{ section.id }}-{{ option.position }}-{{ forloop.index0 }}">
					{{ value }}
				</label>
			{%- endfor -%}
		</fieldset>
	{%- endif -%}
{%- endfor -%}
<script type="application/json" id="variants-json">
	{{ product.variants | json }}
</script>
JavaScriptの記述は前述した通りです。画像パスにサイズを追加するとそのサイズで呼び出せるようなので、今回は幅120pxの指定をしています(11行目)。
<script>
{
  const data = document.querySelector('#variants-json').textContent;
  const from_json = JSON.parse(data);
  const colorimgs = document.querySelectorAll('.color-img');
  colorimgs.forEach(function(element, index){
    color = element.parentNode.previousElementSibling.value;
    const product = from_json.filter( function(variant) {
        return variant.option1 == color || variant.option2 == color || variant.option3 == color;
      });
    element.src = product[0].featured_image.src + '&width=120';
  });

  const colortxt = document.querySelector('#color-txt');
  const colorinputs = document.querySelectorAll('input[name="色"]');
  const len = colorinputs.length;
  colorinputs.forEach(function(element, index){
    element.addEventListener('input', function(){
      colortxt.textContent = ':' + element.value;
    });
  });
  for (let i = 0; i < len; i++){
    if (colorinputs.item(i).checked){
      colortxt.textContent = ':' + colorinputs.item(i).value;
    }
  }
}
</script>
<style>
  label.color-label { margin-right: 10px; cursor: pointer;}
  label.color-label img { width: 50px; height: 50px; border: 1px solid #444;}
  input[name="色"] + label.color-label { background: none; border: none; padding: 3px; margin-right: 10px;}
  input[name="色"]:checked + label.color-label { background: none;}
  input[name="色"]:checked + label.color-label img { outline: 2px solid #444; outline-offset: 3px;}
</style>
こんな感じで表示されるかと思います。

以上で「Shopifyの商品詳細画面、オプション選択のバリエーションを文字ではなく画像で表示するJavaScriptを考察(初学者向け)」の解説を終わります。
Tweet
